Projects from Make: Magazine

Illuminate a Dog Collar with LEDs

Illuminate a Dog Collar with LEDs

DogCollar_44

MakeItGlow

It doesn’t take much to add a bit of glow to your projects. In Make It Glow, Emily Coker and Kelli Townley walk you through a number of fun LED projects perfect for kids and beginners. Here’s an excerpt from the book that’s sure to make the sweet pup in your life happy!

And for reference, this is one of the harder projects in the book, and it’s still pretty approachable.

Have fun!


RedDogCollar_17

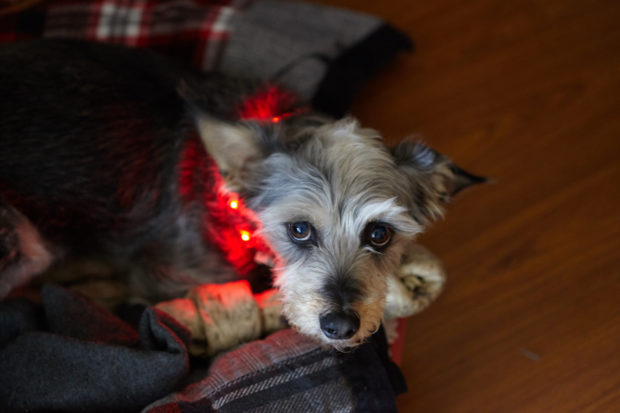
Luminous LEDs glam up your pet’s collar. What pampered pup could ask for more?

Project Steps

1.

RedDogCollar_2

Use a craft knife to cut a small hole in the webbing between the D ring and the female side of the buckle on the pet collar. Feed the leads of the tactile switch through the hole so the wires emerge on the inside of the collar.

2.

RedDogCollar_3

Using a hot-glue gun, glue the base of the tactile switch to the outside of the collar, over the hole you just made, as shown. Then, using super glue, secure the webbing around any cut edges, both inside the collar and out, to keep them from fraying.

3.

RedDogCollar_4

On the outside of the collar, use the hot-glue gun to attach the battery holder on the other side of the D ring from the tactile switch, as shown. Make sure the positive (+) end of the battery holder is facing the buckle and switch.

4.

RedDogCollar_5

Put the collar on your pet and adjust the length to fit. Remove the collar, and on the outside, use pencil or chalk to mark the places where you want LEDs. (If your pooch is still growing, be sure to add some space so the LEDs will look good even if you have to adjust the collar!) To space the LEDs evenly, start from the center of the collar and use a ruler to measure exactly.

5.

RedDogCollar_7

When placements are marked, set the collar down flat in front of you with the D ring to the right. Use tweezers to pick up the tiny LED sequins, and use a small dot of super glue to set each one in place. To make sure all the LEDs complete the circuit and are oriented in the same way, glue each so its negative (–) end points toward the top edge of the collar.

6.

On the tactile switch, use wire strippers to trim the two leads sticking through on the inside of the collar to about 1″ long. Then, strip the plastic off the ends of the leads, exposing about half an inch of the wire inside. If you need, use pliers to help hold everything steady; if the wires separate once exposed, just twist them back together again. When you’re done, use the hot-glue gun to secure the base of the wires to the collar, leaving the exposed wire ends free.

7. 

RedDogCollar_13
Don’t rush! Conductive thread can easily get twisted and knotted. Take the time to unknot the thread if you start to have trouble.

Use a needle with conductive thread to sew down the free end of one of the wires you just stripped (it doesn’t matter which one you choose; tactile switches have no polarity). Sew around the wire as many times as necessary till it’s completely covered. Then push the needle through to the outside of the collar and sew through the sewing hole on the positive (+) side on your battery holder. Knot the thread and cut it

8.

RedDogCollar_12

Using a needle and conductive thread, sew through the sewing hole on the negative (–) side of the battery holder (unlike tactile switches, battery holders do have polarity!), and then sew along the surface of the webbing to the negative (–) hole in the first LED. You don’t need to push the needle through the collar—just pick up the top threads of the webbing as you sew.

9.

Continue sewing until the thread has connected all five LEDs on the negative (–) sides only. Make sure not to cut the thread in between them! And remember, the super glue holds the LEDs in place; the thread just connects them to the circuit. When finished, knot and cut the thread.

10.

RedDogCollar_13

Using a needle and conductive thread, and starting with the LED where you just ended, sew the LED’s positive (+) side, and keep sewing to connect the positive (+) ends of all five LEDs.

11.

RedDogCollar_14

When the positive (+) sides of all five LEDs are sewn together, and without cutting the thread, push the needle through to the other side of the collar and sew the conductive thread to the second, unattached wire lead of the tactile switch. As in step 7, sew around the wire as many times as necessary to completely cover it with thread, then knot and cut the thread.

12.

RedDogCollar_15

When everything’s working, cover your sewing with clear nail polish to set it in place and cover any prickly thread. Finish up by measuring and cutting a scrap of felt in a coordinating color to place on the interior of the collar for your pet’s comfort. Use the hot-glue gun to attach the felt.

Your pup’s gonna love it.

RedDogCollar_17

DogCollar_44

Tagged

Emily Coker

History. Whiskey. Exploring.

Kelli Townley

Kelli Townley

Kelli Townley is a lifelong maker who has worked at Maker Media, Pixar, and several startups, including video games, hardware, and health/wellness.

Maker Faire Bay Area 2023 - Mare Island, CA

Escape to an island of imagination + innovation as Maker Faire Bay Area returns for its 15th iteration!

Buy Tickets today! SAVE 15% and lock-in your preferred date(s).

FEEDBACK